How Do I Change My Msn Name?

change msn email name

Whenever you sign in to your account, your display name is used. The same name will also be displayed on any Windows 10 devices that you might have signed into using your Microsoft Account, and it is the name that others will see when you send emails or take part in an Outlook.com group.

This name could be different from the display name of your local account. To know how to change your MSN name (display name), go through the information provided below.

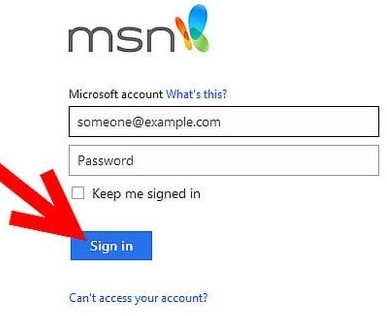
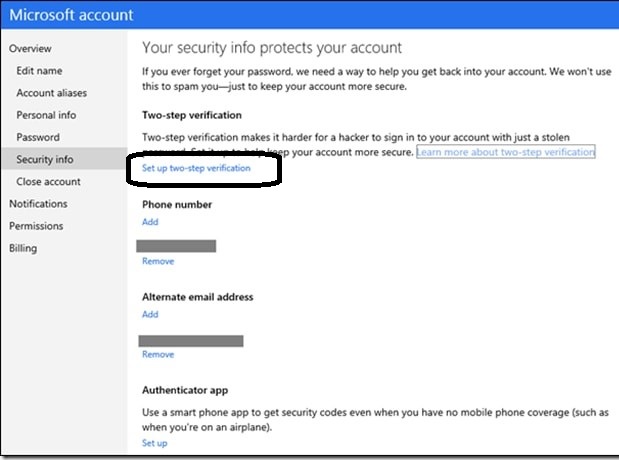
  1. To begin with, you will first need to sign in to the Your info page on the Microsoft account website(http://account.microsoft.com/profile).
  2. Once you are on the page, you will need to select Edit name under your name. If there is no name listed yet, you will need to select the Add name
  3. Then, you will need to enter the name in the field you wish to display, enter the CAPTCHA, and select the Save

NOTE: You might not be allowed to use some names if they would be including blocked words or phrases. If you see an error message when entering your name, you can try entering a nickname instead.

Moreover, if the display name doesn’t change right away, or the previous name is still appearing in emails, your information might have been cached. In order to get the name to update quickly, you can consider switching back to your local account, and then sign in back to your Microsoft account.

So, these are the steps that you will need to follow to change your MSN name (display name) in your Microsoft account. However, if you wish to change the sending name which e-mail recipients see when you send an email using your Microsoft Outlook email program, you can follow the instructions provided below.

Steps to Change Sending Name in Outlook

When you send an email using your Outlook email program, if your email recipients are able to see only a part of your name, for example, your first name, you can easily make the desired changes to it to display your complete or different name. Below are the steps that you will need to follow to change the sending name in Outlook.

NOTE:

  • The display might only show a part of your name if you would have not provided your complete name at the time of setting up your email account for the first time.
  • Moreover, you will not be able to change the display name if you are using a Microsoft Exchange account. In such a case, only your Exchange administrator will be able to make this change.

For Newer Version of Outlook

  • Open the Outlook email program on your computer and go to File>Account Settings>Account Settings
  • Next, you will need to select the email account in which you wish to change your sending name. After selecting the email account, click on the Change
  • On the next screen, you will be able to change your name on the Account Settings In order to change the name that appears when you send an email, you will need to update the Your name field. You can leave the rest of the fields as they are unless you wish to make changes to them.
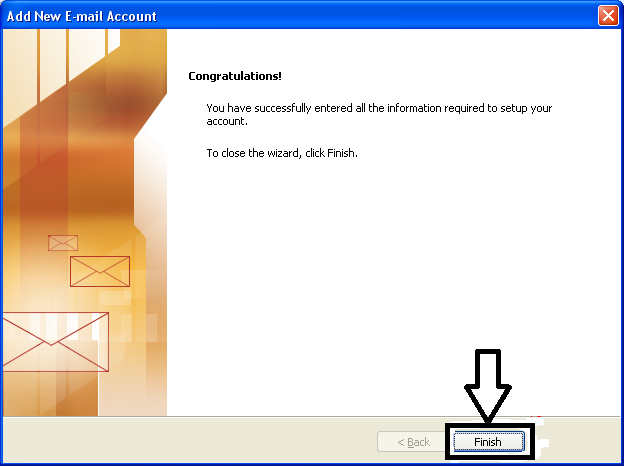
  • Once you are done making the desired changes, click on the Next After that, you can select the Close option to get back to Outlook.

For Office 2010 Outlook

  • Launch Outlook 2010 email program on your computer and click on the File This will open a drop-down menu on your screen.
  • From the drop-down menu, you will need to click on the Account Settings option and then select the Account Settings
  • Then, you will need to select the email account in which you wish to update the name. After selecting the account, click on the Change
  • Now, go to the User Information section, and then to the Your Name In the field, you will need to enter your name the way you want it to display to recipients.

For Office 2007 Outlook

  • If your Outlook email is only showing a part of your name, you can show your complete name by editing your name in the Account Settings
  • For this, you will need to open Outlook 2007 on your computer and go to the Tools
  • In the Tools menu, you will need to click on the Account Settings
  • In the Account Settings section, go to the E-mail tab and select your Internet service provider (ISP) account, Then, click on the Change
  • Now, under the User Information section, go to the Your Name box, enter your name the way you want it to display to the recipients.
  • After that, simply click on the Next and then on the Finish

So, these are the steps that you will need to follow to change your MSN name. For any professional live help call MSN customer service helpline number to fix MSN email problems.

How to Setup MSN Email on iPhone, Android, and Mac

setup email on iPhone, Android, Mac

One of the easiest, fastest, and most reliable communication methods is electronic mail. When we talk about electronic mail, MSN email deserves a mention.

Also known as MSN Hotmail, MSN email has millions of users worldwide. If you are one of the users and want to access your emails on smart devices, such as iPhone, Android, and Mac, we will talk about the various ways to setup MSN email on iPhone, Android, and Mac here.

Steps to Setup MSN Email on iPhone, Android, and Mac

Whether you are an iPhone user or an Android mobile holder, or an owner of a Mac, we will help you send and receive all your MSN emails on your device.

How to Setup MSN Email on iPhone

The following workarounds will help you configure your MSN email on an iOS device.

  • Unlock your Apple device and go to “Settings”.
  • Look for the tab “Mail, Contacts, and Calendars”.
  • Select the “Add Account” option. This should be located below the iCloud tag.
  • Now, select “Other” (Tap this option if MSN email is not mentioned there).
  • Then, you need to tap “Add Mail Account” and provide the following details –
  • Name: Your name
  • Email: Your MSN username is your email address.
  • Password: The password is your MSN.com account password.
  • Description: MSN
  • Tap “Next” and under incoming mail server, choose “IMAP”.
  • Now, you need to enter the following details –
  • Hostname: imap-mail.outlook.com
  • Username: Your MSN email address is your username.
  • Password: The password is your MSN.com account password.
  • Now, under outgoing mail server, you need to enter the following details –
  • Hostname:smtp-mail.outlook.com
  • Username: Your MSN email address is your username.
  • Password: The password is your MSN.com account password.
  • Now, you need to tap the “Save” button.
  • Go to “Settings” and press on the MSN account option.
  • Tap “Advanced”. Under incoming settings, enter the following details –
  • Use SSL: Yes
  • Authentication: Password
  • Server Port: 993
  • Under outgoing settings, enter the following details –
  • Use SSL: Yes
  • Authentication: Password
  • Server Port: 587

There you go! You have successfully configured your MSN email on your iPhone.

How to Setup MSN Email on Android

The following workarounds will help you configure your MSN email on your Android device.

  • Open your Android device and go to Menu.
  • From the top 3 lines, you need to tap “Settings” > “Add Account”.
  • Here, you need to tap the “Other” option into the Setup email section.
  • Click “Manual Setup” after entering your MSN.com email address and select “IMAP account” to enter the following incoming server settings details –
  • Username: It is your MSN email address.
  • Password: It is your MSN account password.
  • IMAP Server: imap-mail.outlook.com
  • Security Type: SSL
  • Port: 993
  • Tap the “Next” button.
  • Under outgoing server settings, you need to enter the following details –
  • SMTP Server: smtp-mail.outlook.com
  • Port: 587
  • Security Type: SSL
  • Tap the “Next” button and select “Email check frequency”
  • Provide your account name and tap “Done

You have successfully configured your MSN email on your Android phone.

How to Setup MSN Email on Mac

The following workarounds will help you configure your MSN email on Mac.

Automatic Setup –

  • On your Mac, open “Mail”.
  • Click the “Preferences from the Mail” menu.
  • Now, click “Accounts”.
  • You will see a plus (+) sign under “Accounts”. Click on it to begin adding a new account to Mail.
  • In the “Email Address” text box, type in your MSN email. In the “Password” text box, type in the password.
  • Click on the “Create” option only to find Mail trying to apply all the necessary settings for your MSN account.
  • On the “Account Summary” page, you need to click “Create” to finish creating your MSN account in Mail.

Manual Setup –

The manual configuration process needs some careful attention. Keep an eye on every detail that you provide and ensure it brings desired results. Let’s take a look at the following steps –

  • Mail will help you with some dialog boxes if it doesn’t locate your MSN account. The dialog boxes will need your information.
  • Select the “POP” option from the “Account Type” drop-down menu (On the “Incoming Mail Server” page).
  • In the “Incoming Mail Server” box, you need to type “pop3.live.com”.
  • In the “User Name” box, enter your MSN email address and then the MSN password. Click “Continue”.
  • For Outgoing Mail, you need to provide the following details. From the Outgoing Mail Server, select “smtp.live.com”.
  • Under “Use Authentication”, enter a password.
  • Click “Continue”. Click “Create” on the “Account Summary” page.

There are several advantages to having an MSN email account. Like any other email client, MSN email bestows you instant communication access not only businesses but also with friends and family. Since MSN email boasts plenty of storage space, you can make the most out of it by keeping your important information. Further, it has an amazing interface. It has its instant message services that allow you to communicate with friends conveniently and instantaneously. It is free and easy to use.

Regardless of your device, you can access your MSN email account, use its messenger, and use it effectively without any hassle.

If you are not a tech-savvy person and failed to configure your MSN email on Android, iPhone, and Mac, seek technical help from the highly-trained, certified professionals. The knowledgeable individuals can be reached at MSN Customer Support. They are available for round the clock and are recognized for their quick, awesome tech support. Dial the number to speak to one of the industry-trained technicians and avail of yourself the best help.

What are you waiting for? Set up an MSN email on your smart device by yourself or let the professionals do it for you!

My Pictures Will Not Upload to MSN Email; How to Fix?

pic not uploading in MSN

Your MSN email account not only allows you to send text messages to the recipient but also provides you the option to send files such as documents, videos, and images. For example, to send a file, all you need to do is click on the file attachment option in the email box that you are composing and send the email once it gets uploaded. While the process to attach and send a file is an easy process, however, sometimes, some of the MSN email users face trouble uploading a picture in their email. If you are also experiencing issues uploading a picture in your email account, you can fix the problem by following the information provided below.

Guide to Fix “Picture Uploading” Issue in MSN Mail

NOTE: Microsoft has moved all its email services – Hotmail, Office 365, Live Mail, MSN Mail, to a single codebase at Outlook.com. The following steps are based on Outlook.com.

When you are unable to add pictures or attachments to your Outlook.com email, you can follow the instructions provided below:

  • If you are replying to an email that has a photo attached, the file will not be included in the reply. In order to keep the original attachments, you will need to forward the em­ail instead.
  • You will only be able to attach files to calendar events that would have been created by you or a delegate.
  • Every email service poses a restriction on the size of an email that you send. The size limit for an email in Outlook.com is limited to 29 MB. This limit comprises all text and attached files. You can try reducing the file size if it is exceeding the limit a bit only.

NOTE: Resizing a picture will not reduce its file size. To lower the size of an image or attachment, you will need to try compressing it.

  • If the size of the file you are trying to attach is exceeding the limit of the email, you can try attaching the link of the files through OneDrive. As links to files from OneDrive are considered in the email size limit, you can easily attach the link and ask the recipient to open it to view or download the file. However, it is to be noted that the linked file size limit is up to 2GB.

About 1drv.ms Links

If you see a link that begins with 1drv.ms, it means that they are the automatically shortened links of OneDrive attachments. Generally, such links will look something like this: https://1drv.ms/b/s!AC0C90TYTSoiwNzYH64wCRetzMF9

Sharing One Drive File Through an Email

  • Start by typing the email address or contact name in the “Enter a name” or “email address” field. As you will start entering the info in the box, you will see an auto-suggestion list. You can also select a contact from this list.
  • Next, you can add a note for the recipients if you wish. If you wish to change the permission level, you will need to select Anyone with the link can edit
  • Then, simply set the options you want on your link and click on the Apply option when you’re done.

Allow Editing

If you will be sharing files with this type of link, people will be able to edit files and will be able to add files in a shared folder, provided they are logged in with a Microsoft account. Also, recipients will be able to forward the link, change the list of people sharing the files/folders, and change permissions for recipients. In case you are sharing a folder, people having the Edit permissions will be able to copy, edit, move, delete, rename, and share anything in the folder.

NOTE: Deselecting this checkbox means that people will be able to copy, view, or download your files without logging in. Also, they can forward the link to other people, however, they will not be able to make a change to the version on your OneDrive.

Set Expiration Date

With this option, you will be able to set the duration for which you wish to keep the link functional. After that, the link will no more be valid, and you will have to create a new link for users who would want to get access to your file or folder.

Set Password

When a user will click on the link, he/she will be prompted to provide a password in order to access the file. You will need to provide this password separately to the recipient.

After making the desired changes to the above-mentioned options on your screen, you can simply click on the Apply button and send the file.

So, these are the steps that you will need to follow to easily upload pictures to MSN Email.

How to Configure MSN Email Account With Outlook 2016

How to Configure MSN Email Account in Outlook 2016

Do you want to configure the MSN mail account with Outlook 2016? In order to configure it, you have to go through the proper procedure of configuring the MSN account with Outlook 2016.

You can get a better idea of accessing your email account via Outlook 2016 from here. So, let’s learn the procedure for configuring an email account.

Steps to Configure MSN Mail Account with Outlook 2016:

Trick 1: Automatic Configuration:

  • In the beginning, you need to open Outlook and choose the File tab for choosing the Account Information option.

open outlook 2016

  • Now under Account Information, you need to enter Add Account option.

click add account option

  • Afterward, you have to choose an E-mail Account, and then enter your Email Address, Name, and Password in the given field.enter the details
  • And after entering, enter the Next button.
  • With this, Outlook will start configuring the MSN Mail account automatically.
  • After getting the procedure completed, you will see a message saying on your system screen Congratulations.
  • At last, enter Finish and then restart your Outlook.
  • You can see the MSN account you have added on the left side of the Outlook window situated just below the inbox of the main account.

Trick 2: Manual Configuration:

  • You have to open Outlook and then go to File > Account Information > Add Account. Choose option Manual setup or additional server types.
  • Enter the Next button.
  • On the IMAP and POP Account Settings Window, you have to make the following changes:

Enter Name & Email Address

Account type: This is usually IMAP

Incoming mail server: imap-mail.outlook.com

Outgoing mail server: smtp-mail.outlook.com

User Name: Complete email address

Password: Enter your password

  • Afterward, go to More Settings > Outgoing Server and choose the box which is next to My outgoing server needs authentication.
  • Now, under the option of the Advanced tab, just make the following changes:

enter the server details

Outgoing server (SMTP): 587 or 465

Use the following type of encrypted connection: TLS or SSL

Incoming server (IMAP): 993

Use the following type of encrypted connection: SSL

  • Finally, you have to choose OK > Next > Finishset up finish

Successfully, you have completed the configuration process of MSN Mail with Outlook 2016. In case you any doubt during the implementations of these steps, you can contact us.

For email users, experienced professionals of the MSN customer care service support team always ready to resolve any MSN Mail related issues within a short duration.

How to Reset MSN Email Password

How to Reset MSN Email Password

Microsoft launched MSN email on 24th August 1995 which is also the release date of Windows 95. They re-launched the website in 2014 with the new user-friendly interface but shut it down. You can access your MSN account from Outlook.com. If you forgot the MSN email password and can’t access the account; then here are some handy tips to solve the problem.

The default recovery system: Before starting the password resetting process, you should check the status of your Caps Lock button. Sometimes, we enter the proper password in the wrong case. And you should clear the browsing history and try to log in with the old password. If none of the options work for you, first try the default password resetting option.

Here are the Steps to Reset MSN Mail Password :

  1. First of all, go to the MSN Password Reset page
  2. Now choose the reason for resetting the password from the given list.
  3. Now click Next
  4. You have to insert the secondary email address you used at the time of creating the account. You can enter the email of any domain.
  5. Now you have to verify yourself by inserting the CAPTCHA characters.
  6. Now again click Next.
  7. Microsoft will send you a one-time security code to your associated phone number or secondary email address.
  8. You need to enter the code within 15 minutes and click Next.
  9. Now you can reset the MSN password from the page.
  10. Log in to your account with your MSN address and new password.

Security Question:

Many times, the users don’t use the associated email id and phone number. So they cant access the security code. In that scenario, click on I don’t have access to these links. Now you have to fill out a security questionnaire. You may be asked about the subject lines of any recently sent emails, your birthday, credit card info, and many other details. You don’t even need to answer all the questions. You may have to wait for 30 days before getting full access to your MSN email account.

Two-Step Verification:

If you turn on the two-step verification for extra security, some of the apps or devices may not able to recognize your password because they are not updated to prompt a security code. In this case, you can use an app password instead of your regular password.

Customer Care:

If you are unable to reset the password following the above-stated methods, you have to contact the Microsoft customer care to ‘verify the ownership of the account.’

You may also have the option to contact any reliable third-party MSN customer service support team on a toll-free number to get an instant resolution.

How to Add Signature in MSN Email Account

How to Add Signature in MSN Email Account

An Email Signature is a piece of information that is attached at the end of the email. It may be the contact details of the sender including the images, web address, and business contact details. Adding a signature in your MSN email account is a straightforward process. Follow the steps below:

  • Log on to your MSN email account.
  • Click on the gear icon on the top right-hand side of the screen.
  • Click on “Options
  • On the left-hand side, scroll down the page go to the layout and click “Email Signature
  • Check the box if require, Automatically include my signature on new messages/ compose
  • If require check the box “Automatically include my signature on messages I forward or reply to
  • Now in the box, update the content as desired.
  • Press the Save button to finish.

Don’t add too much graphical content as it may slow the page on the recipient’s end. Keep the signature short, simple & brief.

If you are unable to update the signature then, clear the cookies, cache, and entire browsing history of the browser. Switch to the other internet browser if required. Make sure that you have an active and fast internet connection. If none of the above work, then log out from your MSN account. Log in again and try to add a signature. It shall work perfectly fine.

If the problem still persists then, don’t wait for the sticky situation. Call certified professionals of MSN customer care service number toll-free and get instant support for the same.

Problem with Third Party Client Configuration in MSN Account

Problem with Third Party Client Configuration in MSN Account

The third-party email clients such as Outlook, Thunderbird, and Apple Mail are quite popular especially in between the corporate and small-medium business people. Correct account settings play a vital role in smooth performance. If you are finding difficulty configuring your MSN account with the third-party email clients then keep following for the same.

Account settings depend on the provider to provider hence, you must make sure that you have updated exactly the same. It might be possible that there is something wrong with your system as a result; you aren’t able to configure the MSN email account with any third-party email client.

  • You must use the latest version of the third-party email client.
  • Make sure that you have a fast and stable internet connection.
  • Avoid using programs that require high bandwidth during the configuration.
  • You must update the operating system on a regular basis the moment new updates are available.
  • If POP3 account settings don’t work then reconfigure from the beginning as IMAP.
  • If the automatic account setup failed then switch to the manual method immediately.
  • Some email providers may require a secure channel and secure port to communicate, so choose both correctly.
  • You can also use the connector to use the MSN account.

Follow the steps below to configure MSN with Outlook:

  • Open the Outlook in your system.
  • Click on the file and press “Add Account
  • Click to select Manual setup or additional server types and press the next button.
  • Choose IMAP and fill the required information.
  • Click to select the Remember Password.
  • Don’t check the box as “Require login using Secure Password Authentication”.
  • Tap on “More Settings”.
  • Go to the “Outgoing Server” tab and choose “My outgoing server (SMTP) requires authentication”.
  • Click the Advanced tab and choose SSL as the encryption.
  • Incoming Mail server shall be imap-mail.outlook.com and port 993.
  • Outgoing Mail Server shall be smtp-mail.outlook.com and port 587.
  • SMTP server encryption type would be TLS.

Click on the “Test account settings” and you must see the congratulation alert. If there is an error then, go through the steps mentioned above from the beginning.

If the IMAP doesn’t work then you can try with POP3. Some email providers such as Gmail, AOL doesn’t require manual configuration.

If the problem still persists then, call our certified tech experts of MSN customer care service on the toll-free number for the prompt resolution.

Facing Password Recovery Issues in MSN Email Account

Having Password Recovery Issues in MSN Email Account

Can’t remember passwords? Or are you unable to recover the password of MSN account? If the answer is yes then relax! You are at the right place. This small article will not only help you to recover your password but also put some light on the email issues which you might face during the operation.

Steps to Recover MSN Mail Password:

  • Open any of the internet browsers of your choice.
  • Type https://account.live.com/resetpassword.aspx at the address bar and press “Enter
  • Click on “I forgot my password
  • Enter the MSN email address.
  • Type the character shown in the box and select “Next
  • You will have to verify the ownership to the account either via security question or via mobile/email address.
  • If you choose the mobile number or the email address then you will be sent a text or link. You will be redirected to a page where you can reset the password.
  • If you have selected security questions and answers then you won’t be given an option to reset the password until and unless you give the exact answers to the security questions.
  • Follow the on-screen instruction to reset the password.

It might be possible that you get some issues while doing the same. Sometimes whenever you change the MSN mail password and try to login with the new one, you get the error message that invalid password or incorrect. It happens due to the old cookies still lies inside your system. You must clear the cookies, cache and browsing history of your browser and try again. Make sure that you have the latest version of the internet browser. It is recommended that you use the latest version of the Internet Explorer as per Microsoft. However, you can stick with any of the internet browsers of your choice. Apart from the internet browser, you must have a good network connection.

Disable the antivirus for a time being if you think it is restricting MSN. Avoid using MSN if you have a virtual private network as it won’t let you recover your password easily and your MSN email account may get blocked. Accessing MSN through a VPN sends signals to Microsoft that someone else is accessing your account from an unrecognized location and device. As a result, due to the suspicious activities, Microsoft temporarily blocks your MSN account.

For more information and any kind of technical help, don’t forget to contact our certified technicians of MSN customer care support service helpline number toll-free and get instant support for your MSN Email account.

How to Enable Two-Step Verification in MSN Account

How to Enable Two-Step Verification in MSN Account

Two-Step verification process adds an extra layer of security on your email account as despite providing the traditional password you require one more security code to get into your account. Initially, Google and Yahoo introduced the two-step verification but later on Microsoft finally showed their class.

Enable Two-Step Verification in your MSN account:

  1. Log on to your MSN account.
    login into MSN mail account
  2. On the right-hand side click on the username and choose “Account Settings” You may be asked to provide the password. Do it to continue.
    click on account settings in msn
  3. Scroll down the page under the password and security info click on “Edit Security info
    edit security info
  4. Under the two-step verification click on “Setup Two-Step Verification
    set up two step verification
  5. Provide a mobile number or the alternate email address where you wish to receive the code.
    select number or email id
  6. Type the code you received to confirm.
    enter the code
  7. Press OK to finish.

You have successfully enabled the Two-Step Verification in your MSN account.  Now, whenever you will try to get into your MSN account from an unrecognized location or device, you would have to pass the Two-Step Verification process. If you clear the cookies and cache of the system you frequently use, you will have to follow the same.

Remember, this feature has recently been introduced by Microsoft and some of the experiences are still missing at the moment. It might be possible that Microsoft will improve the feature soon as they are supposed to introduce a new era in the MSN email. Rumors are also there that there will be no more MSN email as they are about to transform into completely different things.

It might also be possible that you might experience a little bit of glitch. You can get rid of such glitches by clearing the cookies, cache, and the browsing history of the browser. You can also update the browser to the latest version available. If in the case, it doesn’t work then switch to another internet browser. However, Microsoft recommends the latest version of Internet Explorer. You must ensure a fast but stable internet connection.

If the problem still persists then don’t forget to contact our certified technicians on the toll-free number of MSN customer care support service for quick help and instant resolution of your MSN account.