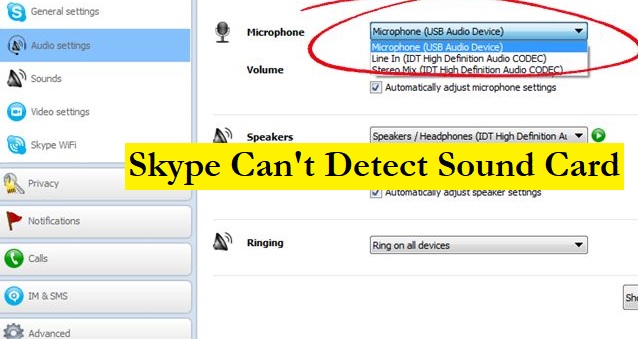
How to Fix “Skype Can’t Detect Sound Card” issue?

Skype sound card

Usually, you won’t find any issue with your Skype application once you install it correctly on your computer. However, sometimes due to incorrect settings, not allowing permissions, or outdated Skype or Operating System can lead to different issues with Skype. One of the most common issues faced by users is the problem of Sound card with the Skype program. If you find that your Skype cannot detect the sound card, you can follow the different workarounds provided below.

Ways to Fix “Skype Can’t Detect Sound Card” Issue

As a sound card is required to connect a microphone or speaker to Skype and other applications, sometimes it may get undetected by Skype due to different reasons. Below you will find the solutions that will help you overcome the problem.

  1. Allow Skype to Use the Microphone

Sometimes, the setting which allows an application to use the microphone can be turned off. Therefore, it is necessary to make sure that permission to use the Microphone is allowed to Skype. To know how to allow permission, follow these steps:

  • Click on the Windows Start option located on the lower-left corner or press the Windows key on your keyboard.
  • From the menu, you will need to select the Settings option and then the Privacy
  • In the Privacy section, click on the Microphone option located on the left-hand side menu.
  • Then, turn the Allow apps to access your microphone option’s slider to ON.
  • Check if this helps you fix the problem.


  1. Use Hardware and Devices Troubleshooter

As the problem is related with the access to the sound card, you can use Hardware and Devices troubleshooter to identify and fix the issue automatically.

  • Go to the Start menu and click on the Settings
  • In the Settings section, you will need to select the Updates and security option and then go to the Troubleshoot
  • In the Troubleshoot tab, you will need to select the Hardware and Devices troubleshooter and click on the Run the troubleshooter
  • Once the troubleshooting process gets completed, you will need to restart your computer to see if the problem is fixed or not.


  1. Keep Your Windows OS Up-To-Date

Having an outdated Windows operating system can also lead to issues with the different applications installed on your computer. Therefore, it is suggested to make sure that the operating system of your Windows is running with the latest updates. You can check for the updates by following these steps:

  • Go to the Start menu on your computer and type Updates in the search field.
  • From the search result, you will need to select the Check for updates
  • On the window that appears on your screen, you will see if any update is available for your system.
  • If you find any update available, make sure to download it by following the on-screen prompts.


  1. Keep Audio Inputs and Output Drivers Up-To-Date

Just like it is important to keep your Windows operating system up-to-date, it is also necessary to ensure that the Audio Inputs and Output drivers are also running with the latest updates. While the updates available for Windows usually include updates for drivers as well, however, you can also check if any update is available for Audio Input and Output Drivers by following these steps:

  • In the Start search field, type Device Manager.
  • From the search result, you will need to select the Device Manager
  • In the Device Manager window, you will need to click on the Audio inputs and outputs You will find two options under it. They are
    • Microphone
    • Speakers
  • You will need to right-click on both options (one at a time) and select the Update driver Then, follow the on-screen prompts to update the driver.


  1. Check Skype Updates

In addition to updating the operating system and audio inputs and outputs drivers, it is also necessary to check if any update is available for your Skype program. As using an outdated Skype program can also cause problem detecting sound card sometimes, you can follow these steps to check Skype updates:

  • Launch the Skype program on your computer.
  • Once it gets opened, you will need to click on the menu option (three horizontal dots).
  • From the drop-down menu, select the Help and Feedback option.
  • On the next screen, you will see if any update is available for your Skype program or it is already running with the latest updates.


  1. Uninstall and Re-Install Skype Program

If even after following the above-mentioned workarounds, you are unable to fix the sound card issue in your Skype program, you can consider uninstalling Skype from your program and installing it again.

  • Make sure to download Skype for desktop applications from the Microsoft website only.
  • Restart your system once after uninstalling and reinstalling the Skype program.
  • When setting up a Skype program on your desktop, make sure to read each on-screen prompts to make sure that the installation process gets completed successfully.
  • Sign in to your Skype account only after restarting your system.

So, these are the workarounds that will help you fix “Skype can’t detect sound card” issue. For any further help you can contact customer support helpline number of Skype to fix your problem.

My Pictures Will Not Upload to MSN Email; How to Fix?

pic not uploading in MSN

Your MSN email account not only allows you to send text messages to the recipient but also provides you the option to send files such as documents, videos, and images. For example, to send a file, all you need to do is click on the file attachment option in the email box that you are composing and send the email once it gets uploaded. While the process to attach and send a file is an easy process, however, sometimes, some of the MSN email users face trouble uploading a picture in their email. If you are also experiencing issues uploading a picture in your email account, you can fix the problem by following the information provided below.

Guide to Fix “Picture Uploading” Issue in MSN Mail

NOTE: Microsoft has moved all its email services – Hotmail, Office 365, Live Mail, MSN Mail, to a single codebase at Outlook.com. The following steps are based on Outlook.com.

When you are unable to add pictures or attachments to your Outlook.com email, you can follow the instructions provided below:

  • If you are replying to an email that has a photo attached, the file will not be included in the reply. In order to keep the original attachments, you will need to forward the em­ail instead.
  • You will only be able to attach files to calendar events that would have been created by you or a delegate.
  • Every email service poses a restriction on the size of an email that you send. The size limit for an email in Outlook.com is limited to 29 MB. This limit comprises all text and attached files. You can try reducing the file size if it is exceeding the limit a bit only.

NOTE: Resizing a picture will not reduce its file size. To lower the size of an image or attachment, you will need to try compressing it.

  • If the size of the file you are trying to attach is exceeding the limit of the email, you can try attaching the link of the files through OneDrive. As links to files from OneDrive are considered in the email size limit, you can easily attach the link and ask the recipient to open it to view or download the file. However, it is to be noted that the linked file size limit is up to 2GB.

About 1drv.ms Links

If you see a link that begins with 1drv.ms, it means that they are the automatically shortened links of OneDrive attachments. Generally, such links will look something like this: https://1drv.ms/b/s!AC0C90TYTSoiwNzYH64wCRetzMF9

Sharing One Drive File Through an Email

  • Start by typing the email address or contact name in the “Enter a name” or “email address” field. As you will start entering the info in the box, you will see an auto-suggestion list. You can also select a contact from this list.
  • Next, you can add a note for the recipients if you wish. If you wish to change the permission level, you will need to select Anyone with the link can edit
  • Then, simply set the options you want on your link and click on the Apply option when you’re done.

Allow Editing

If you will be sharing files with this type of link, people will be able to edit files and will be able to add files in a shared folder, provided they are logged in with a Microsoft account. Also, recipients will be able to forward the link, change the list of people sharing the files/folders, and change permissions for recipients. In case you are sharing a folder, people having the Edit permissions will be able to copy, edit, move, delete, rename, and share anything in the folder.

NOTE: Deselecting this checkbox means that people will be able to copy, view, or download your files without logging in. Also, they can forward the link to other people, however, they will not be able to make a change to the version on your OneDrive.

Set Expiration Date

With this option, you will be able to set the duration for which you wish to keep the link functional. After that, the link will no more be valid, and you will have to create a new link for users who would want to get access to your file or folder.

Set Password

When a user will click on the link, he/she will be prompted to provide a password in order to access the file. You will need to provide this password separately to the recipient.

After making the desired changes to the above-mentioned options on your screen, you can simply click on the Apply button and send the file.

So, these are the steps that you will need to follow to easily upload pictures to MSN Email.

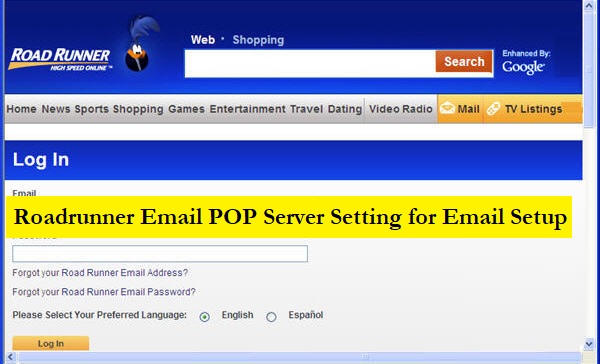
Roadrunner Email POP Server Setting for Email Setup

roadrunner email server settings

The POP and IMAP settings are the two most important Roadrunner email server settings required to configure email on various third-party mail applications including Thunderbird, Outlook, etc., as well as several devices including iPad, smartphones, tablets, etc. If you are a Roadrunner user, check the following Roadrunner email settings to configure your email on both mail applications and various devices.

  • Pop is the account setting type.
  • twc.com is the incoming mail server.
  • The port number is 995 and the incoming server port type is POP 3.
  • SMTP (outgoing mail server) is mail.twc.com.
  • The SMTP port is 587.
  • Lastly, for inbound and outbound, you need to use your email ID and password.

Before configuring your Roadrunner email on mail applications or devices where an existing email is already configured, you must understand that setting up a new POP may delete the old emails stored in the particular mail application. This may happen as actions performed on email settings are limited to a particular device or computer.

What Is Roadrunner Email POP Server Setting for Email Setup?

A Roadrunner user can set up or configure the POP email settings on various devices at the same time. While configuring, the user must keep in mind that the Roadrunner email might not get synced with the webmail server. This often occurs when the email server settings are incorrect. Hence, the user must ensure that the email server settings entered are correct. To configure your email correctly, you are advised to go through the steps mentioned underneath.

Roadrunner Email POP Server Settings on Apple Devices like iPhone or iPad

  • Go to the email setting and choose mail, contacts, and calendars.
  • Here, you need to tap “add account” and choose an email provider.
  • You need to provide your login credentials like username (email address) and password.
  • Then configure the POP server settings, select the POP 3 server from the list, and configure the outgoing email setup.
  • Save” and select the email settings shown on your screen.
  • In the settings, select the main server as SMTP and enter the server port as 25.
  • Now “Done”.
  • Reboot your device to make sure the settings are correctly configured.

Try and send an email through your Roadrunner account from your device and ask your friend to send you across an email to ensure that it is working properly.

Roadrunner Email POP Server Setting for Microsoft Account

Want to configure your Roadrunner email on Microsoft? This is how you should do it –

  • Go to the “File” option in your Microsoft Mail account and click on the “Add Account” option.
  • Select “Manually configure server settings” (This is because your Roadrunner Email needs manual server configuration).
  • You need to provide your full name in “Email Name” and the complete email address in the username section.
  • Now, give your email password and click on the account type option.
  • Choose the POP3 server and provide mailtwc.com as the outgoing server domain as well as the incoming server domain.
  • Finish” the configuration on Microsoft.
  • Once the configuration is done, you will be able to get your roadrunner emails in your Microsoft email.

Roadrunner Email POP Server Settings on Android Devices

If you are an Android user, you have got to follow the steps mentioned underneath.

  • Open the email application that you want to configure your Roadrunner email ID with.
  • Enter your email address (Roadrunner) and click “Next”.
  • Choose the POP3 setting, enter the password, and click “Next”.
  • Enter the username and password and the outgoing server.
  • This helps you set your Roadrunner email on POP3.

Similarly, configure the outgoing POP3 setup for smooth sending/ receiving emails. if still you need roadrunner email expert, you can call toll free Roadrunner customer service number to speak with experts.

Yahoo Mail Problems List and Permanent Solutions

yahoo mail problem

Only the Yahoo Mail users can tell how frustrating it is when they can’t access their important emails. Although Yahoo Mail is recognized for its magnificent design, efficiency, reliability, and ease, it fails to ward off technical glitches and other Yahoo mail problems.

Now and then, users of Yahoo have to face some sort of errors that prevent them from accessing their accounts. If you have recently signed up with Yahoo Mail and haven’t encountered anything like this, this complete list of Yahoo Mail problems and their solutions will come in handy for you.

Complete List of Yahoo Mail Problems That Continue to Hinder Your Smooth Experience

No one is going to appreciate if Yahoo Mail errors continue to occur and frustrate the user experience.

No matter whether you have installed highly-reliable antivirus thinking that would not let anything happen to your Yahoo Mail account or have purchased an expensive device, you will have to be ready for the ultimate face-off. And when this amazing list of Yahoo Mail errors and solutions is at your disposal, you can get ready beforehand.

Experiencing the ‘Yahoo Mail not working’ issue? Follow this ultimate guide to fix a wide range of Yahoo Mail problems –

1) Fix ‘Can’t Send or Receive Emails’ Yahoo Problem:

One of the frequently occurred Yahoo Mail problems that users experience is ‘can’t send or receive emails’.

  • A Message I Sent Wasn’t Received: When you send an email and it fails to reach the concerned person, “make sure the email was sent”. To do so, you must check your sent folder, check for typos, and check your drafts folder.

Another way to check why it hasn’t reached the recipient is to “ask your recipient to check their account”. You may ask the person to check their spam folder, blocked address list, and filters.

  • Email Isn’t Received in Yahoo Mail: This can take a toll when you expect an important email but don’t get it. You would like to check your account for any errors, check the account settings (email filters, spam folder, blocked address, and reply-to address), etc.

2) Yahoo Mail Firefox Problem:

If your Internet connection is working just fine and you still are facing problems accessing your Yahoo Mail account using the Firefox web browser, some of the top fixes would be –

  • Clearing the temporary files and cookies
  • Enable your cookies
  • Check your password
  • Use a different web browser if everything else is fine

3) Message List Loading Problem:

When you are experiencing Yahoo Mail loading problem, you are advised to clear your browser’s cache, update the web browser, disable browser enhancements, make sure JavaScript is enabled, reset your browser to default settings, and temporarily disable antivirus, firewall, and antispyware products.

4) Login Redirect Issue:

Most users of Yahoo Mail have to deal with the login redirect issue while trying to login to their Yahoo Mail account. They complain about being redirected to the AT&T login page. Users are encouraged to login from the AT&T login page if they have an account with the AT&T account. If you have an account with Yahoo and still facing the issue, change the password, and log in from this link (https://currently.att.yahoo.com/).

5) Draft Problem:

First of all, how did you end up with a dozen emails when you had sent them previously? Oh, wait! Did Yahoo flag them as spam and make them sit in the draft? If that is the case, you can get rid of the draft problem by editing and resending them. Also, you must keep in mind that Yahoo Mail auto-saves emails during a compose an-email session.


6) Image Not Loading:

Are you trying to send an email with an embedded image but it is not displaying in the mail? Or, Yahoo Mail shows an ‘image not loading’ issue when you receive an email with embedded pictures. Possible reasons for these images not displaying could be –

  • “The HTML in the email may reference a file that isn’t on the hosting server anymore”
  • Incorrect format of the image
  • Maybe, the image is referenced as a relative URL (since you can’t receive the image). To see the image, make sure you have access to the relative URL’s server or directory.

7) Yahoo Mail not working with iPhone:

Invalid settings are to be blamed when your Yahoo Mail account is not working with iPhone. You must check whether it works outside of the app. For that –

  • Try a different device or computer.
  • Log in to your account and compose a new email.
  • Send the email and check whether you receive it within 5 minutes.
  • You will receive it if there’s no error.

You can update your OS, remove and re-add Yahoo Mail to iOS Mail, use the Yahoo Mail App, or add your Yahoo Mail account to iOS Mail with IMAP.

8) Mail PDF Open Issue:

Can’t read a PDF document? You are advised to upgrade your web browser to the latest version and download and install the free Adobe Reader program. Also, you are required to disable the firewall protection or any antivirus embedded as they could be blocking you from downloading the file.

Did you manage to get rid of all these issues? Or, are you still getting them? You need to contact Yahoo customer support for instant assistance.