Unable to Attach file in Outlook Email?

outlook file attachment error

Can’t attach a file in an email? Here is help. Are you following the proper steps to attach the file? First, let’s make sure that you are following the correct process. Cross-check from the instructions given below:

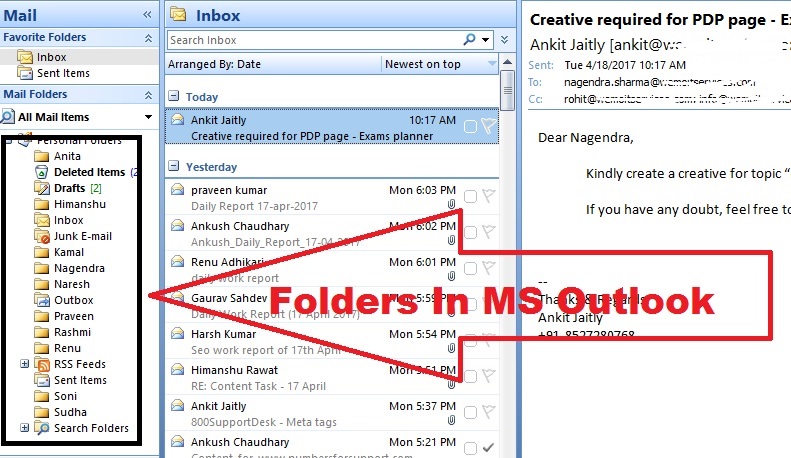
Attach a file to Outlook in Windows

  • Click the ‘New’ option in your mailbox to compose a new email. Click on ‘Reply’ if you want to reply to a message.
  • Select ‘Attach file’ in the ‘include’ option of ‘Message’ ribbon.
  • Select the file from its location on the computer and click ‘Insert.’

OR

  • You can simply drag the file on the message body for making the quick attachment.

If you are following the above process correctly, let’s have a look at the possible reasons why you can’t attach a file in Outlook email with their respective solutions.

Outlook considers attachment file as Suspicious

Outlook considers some file extensions as malware and therefore restricts them as an attachment to save users’ systems. For this follow the steps:

  • Go to outlook.com and sign up for your account.
  • Click on the gear icon (locate it at the top right corner of your inbox.)
  • Select ‘More mail settings’ from the drop-down.
  • Under the ‘Writing emails’ option, click ‘Attachments.’
  • Select the radio button (small circle) in front of ‘Always send files as attachments.’
  • Click ‘Save.’

Try to attach the file after making changes. It will resolve your problem. You can also convert the file to Outlook compatible extension.

Another reason why attachments are considered suspicious is the content inside them. Yes, Outlook (actually all emailing services) scans the content of the attached document for spam. If your file contains any spam link or image, remove it and then try again.

File size exceeds Outlook Limit

The default Outlook limit for attachment files is 20MB. So, it is clear that any file exceeding this limit will not be accepted as an attachment. Consider dividing the file content to make smaller size files.

Selection Window goes to Background

The file selection window moves to the background and the user keeps on waiting for it. When one window is open in the background, you will not see anything no matter how many times you hit that ‘Attach file’ button. So, minimize all the tabs to find the selection window.

Still can’t attach files? Talk to experts at Outlook customer service for quick solutions. The number is toll-free and accessible all the time.

How To Use Folder in MS Outlook 2013

It can be difficult at times to find that important mail from your full inbox. Organizing your inbox with the help of folders is a good option so that you never end up in such a situation. MS Outlook offers different tools to manage emails viz. folders, categories, and rules. Here we will discuss the first one in detail. Keep on reading to learn how to use folders in MS Outlook 2013.

Creating a New Folder In MS Outlook 2013

  • Right-click on your account name or on the folder under which you want to create a new folder; options will appear; select “New Folder” from them.
  • Now a box will appear to name your new folder; type in the name and “Enter.” It is recommended to use a self-explanatory name so that mails can be found easily.
  • You have successfully created a new folder in your Outlook account.
right click to create folder in ms outlook

If you are using Outlook online; follow these steps in the Outlook Web App.

  • Move the cursor over “Folders”, click on the + icon next to it. A box will appear, type the desired name and press “Enter.”

Using a New Folder

Now that you have created a new folder, you need to learn how you can use it or how you can move emails to different folders. Let’s have a look:

The simplest way is to drag and drop the email in the folder you want. You can also go with this alternate method:

  • Click on the message you want to move.
  • Now go to the Home tab, click on “Move.” You can also use the short cut CTRL+SHIFT+V or right-click.
  • Now select the folder where you want to move the message. If you can’t find the folder; click the Other Folder option and use it to move mails.

If you are among those users who love the search option and remember the keywords of almost every mail; here are some tips (other than creating folders) to keep your inbox much organized.

  • Delete the messages which you don’t require any more. If some messages are old but important; you can use the “Archive” feature to move them out of the inbox.
  • Create sorting rules for emails to organize inbox.
  • Report junk mails quickly.
  • Unsubscribe newsletter and notifications which are not important.

If you still have a problem with using folders in MS Outlook 2013, contact our Outlook Customer Service for solutions.

Learn How to Schedule Email in Outlook Account

schedule email outlook

Sometimes, sending an email or replying to a specific email instantaneously is not a good idea when you have some serious negotiations going on and your seniors cannot be contacted immediately. Or, you have written an angry email in a fit of rage and you know you will regret it after a couple of hours.

These are a few instances where scheduling an email for a future time comes in handy. If you use Outlook, you are in luck. In this blog, we will talk about the steps to delay or schedule an email in the Outlook account.

Complete Steps to Delay or Schedule Email in Outlook Account

You can either schedule the delivery of an individual message or use rules to delay the delivery of all messages by having them held in the Outbox folder for a certain period after you click ‘Send’.

The following steps can be applied in Outlook for Microsoft 365, Outlook 2019, Outlook 2013, Outlook 2010, and other versions such as Outlook 2007.

Delay or Schedule the Delivery of a Message –

  • Launch Outlook and click compose a message option.
  • From the “Tags”group in the Ribbon, you need to choose the “More Options” arrow.
  • Click the “Do not deliver before” checkbox under “Delivery Options” and click “Send

The message remains in the “Outbox” folder until the delivery time. In case, you change your mind and wish to send the message, here’s what you should do.

  • Go to the “Outbox” folder.
  • Click the delayed message to open it and from the “Tags” group in the Ribbon, you need to choose the “More Options” arrow.
  • Click the “Do not deliver before” checkbox under “Delivery Options”.
  • Click “Close” and “Send

Delay or Schedule the Delivery of a Message –

Outlook has a great feature that allows you to create a rule that can schedule or delay the delivery of all messages by a couple of hours.

  • Open your Outlook and go to the “File” tab.
  • From there, you need to select the “Manage Rules & Alerts”.
  • Click “New Rule”.
  • You need to click the “Apply rule on messages I send” option in the “Step 1: Select a template” box under the “Start from a Blank Rule” option.
  • Click “Next”.
  • Select the checkboxes for options that you wish to choose (in the “Step 1: Select conditions”).
  • Click “Next”.

(Unless you select any checkbox, you will see a confirmation dialog box that appears on your screen. Selecting the option “Yes” applies the rule to all the messages that you send)

  • Select the checkbox “defer delivery by a number of minutes” in the “Step 1: Select actions” list.
  • Next, you need to select “a number of” (the underlined phrase) in the “Step 2: Edit the rule description (click an underlined value)” box and enter the time that you want the messages to be held before it is sent. Keep note that you can delay the messages up to two hours or 120 minutes.
  • Click “OK”.
  • Click “Next” and click the checkboxes for any exceptions (in case you want).
  • Click the “Next” option and type a name for the rule in the “Step 1: Specify a name for this rule”.
  • Click the checkbox “Turn on this rule” and click “Finish”.

As you click the “Send” option, all the messages in the Outbox folder stay for the specific time you have specified or selected.

Got any query or need technical help? Contact Outlook Customer Support immediately!

How to Whitelist an Email in Outlook (Safe-list Email Address)?

whitelist an email in outlook

Imagine this – you are expecting an important email from your client, but you never get that. Strange?

Why not ask your client whether he/ she has sent the message? If he/ she has, where did it go?

Did it end up in the junk or spam folder? There’s a possibility of this. Just go through the spam folder and confirm the status. In most cases, it does end up in the unwanted folder. So, you have got to do some exercise and fix the error.

In this blog, you will learn how to whitelist an email in Outlook.

How to Whitelist an Email Address in Outlook.com?

Safe listing an email address from a particular contact or recipient would surely reach the inbox (and not in the spam or junk folder). After you have whitelisted the address, it would straight go where it is supposed to, i.e. your inbox.

At the same time, you must keep in mind that the role of the Outlook Junk Email Filter is to move suspicious emails to the Junk Mail folder. When it comes across such suspected spam, it wouldn’t hesitate to move to the junk folder. Also, you need to make it a habit to check your Junk Mail folder regularly for any important emails and then add them to the Safe Senders list.

Let’s quickly understand what happens when whitelisting an email sender.

It is pretty evident how frustrating it can get when you have to dig through your spam folder to find the email that you are looking for. This process certainly is annoying and ultimately decreases your productivity. So, it is important to whitelist the emails from a specific sender. When you do it, you tell your email provider that emails from that sender should be allowed to go into your inbox. So, the next time that sender emails you, rather than being filtered into spam it goes straight into your inbox.

So, let’s learn how to whitelist an email in Outlook. You can add email contacts to the Safe Senders list in the following ways.

  1. Add Contacts to Safe Senders List Manually:

Here’s how you can permanently whitelist an email address in Outlook.com.

  • Launch Outlook.com and go to “Settings”.
  • Now, click on “Options” and choose “Junk Email” (in the left pane).
  • Click on the “Safe Senders” list.
  • You need to enter the email addresses or domains and click on the “Add” button.
  • Click “Save”.

You have now manually added domains or email addresses to the Safe Senders list.

  1. Add Contacts to Safe Senders List Automatically:

Whitelisting can also be done automatically.

  • Click on the “Home” screen and choose “Junk”.
  • Click on the “Junk Email Options”.
  • Now, on the Safe Senders tab, check the box next to “Automatically add people I email to the Safe Senders list”.
  • That’s it!
  1. Unblock Senders Manually:

You have your Blocked Senders list. You need to check this folder from time to time to ensure you are not missing out on any important message. Or, in case you have added any of your potential client’s email to the Blocked Senders list by mistake, you can unblock it by selecting “Settings”> “Options”.

You will have to click on the “Junk Email” option in the left pane. Click “Blocked Senders”. Here, you will have the option to choose the email addresses or domains that you would like to unblock. Now, click the trash bin icon and click “Save”.

Outlook will continue to send emails to the Junk Mail folder unless they are added to the Safe Senders list. You can add an individual email address to the Outlook Contacts. This is quicker and more efficient than entering information manually.

The above methods don’t necessarily need professional help. If you are busy doing something more important, assign the task to knowledgeable and experienced technicians. You can reach out to them at Outlook Customer Support Number!

How to Sync Google Calendar With Outlook?

sync google calendar with outlook

Importing the snapshot of your Google calendar into Outlook allows the users to check it alongside the other calendars in your Outlook Calendar View. In order to keep your imported Google Calendar up-to-date, you will need to subscribe to the Google Calendar in Outlook. However, if you do not wish to do that, the alternative ways to update your calendar is by importing the snapshot of your Google calendar from time to time.

Continue reading “How to Sync Google Calendar With Outlook?”

How to Add Signature In Outlook?

Outlook allows users to create multiple personalized signatures for your email messages. The signature you create in Outlook can include text, photos, logo, electronic business card, and even image of your handwritten signature.

Also, you can configure your Outlook to automatically add a signature to all outgoing messages, or you can create a signature and add it to email messages as per your requirement. To know how to add a signature in your Outlook account, follow the step-by-step instructions provided below.

Continue reading “How to Add Signature In Outlook?”

Outlook Search Not Working? Learn How To Fix

Outlook search not working

While Outlook is known for offering an uninterrupted mailing environment, however sometimes, some users face trouble with the Search option in their Outlook. If you are also facing the issue with the Search option in your Outlook account, you can follow the below-mentioned step-by-step instructions to fix the issue.

Continue reading “Outlook Search Not Working? Learn How To Fix”

How to Use Quick Parts in Outlook 2010

Quick Part is an amazing feature in Outlook which allows users to have access to text blocks and use them whenever required. These reusable pieces of content or other email parts are usually stored in galleries. They can be distributed with templates and can also be used by other people. To know how to use Quick Parts in Outlook 2010, follow the information provided below.

Continue reading “How to Use Quick Parts in Outlook 2010”